
मशरूम की खेती पर यह मार्गदर्शिका आपको मशरूम की खेती की मूल बातें समझने में मदद करेगी। इस लेख को पढ़कर जानें कि आप अपना लाभदायक मशरूम फार्म कैसे शुरू कर सकते हैं।
अन्य पारंपरिक फसलों की खेती के विपरीत, जिसमें स्थान, समय और उच्च निवेश की आवश्यकता होती है, मशरूम की खेती करना आसान है। इसके लिए अधिक निवेश की आवश्यकता नहीं होती है और आप जमीन के एक छोटे से हिस्से में भी मशरूम की खेती कर सकते हैं।
इसलिए भले ही आप एक छोटे पैमाने के किसान हैं जो मुनाफा कमाने के लिए संघर्ष कर रहे हैं, मशरूम की खेती पूल में सोना हो सकती है। आपको बस उपयुक्त कौशल सीखना है, थोड़ा अभ्यास करना है और फिर उस स्वर्ण को प्राप्त करने के लिए गोता लगाना है।
और मैं बुनियादी अवधारणाओं और कौशल को समझने में आपकी मदद करूंगा जो आपको अपना मशरूम फार्म शुरू करने में मदद करेंगे। लेकिन खेती की प्रक्रिया को समझने से पहले आइए जानते हैं खाद्य मशरूम जिसे हम उगा सकते हैं।
Table of Contents
खाद्य/खेती मशरूम
आपने वर्षा ऋतु में विभिन्न प्रकार के मशरूमों की वृद्धि देखी होगी। लेकिन आपने उन्हें कभी नहीं खाया है। क्या आपने कभी सोचा है क्यों?
यह काफी सरल है क्योंकि सभी मशरूम खाने योग्य या हमारे लिए फायदेमंद नहीं होते हैं। दुनिया में मशरूम की 2,000 से अधिक प्रजातियां हैं लेकिन मशरूम की केवल 25 प्रजातियों को ही व्यापक रूप से खाद्य मशरूम माना जाता है। इन 25 प्रजातियों में बटन मशरूम यानी अगारिकस बिस्पोरस दुनिया में सबसे ज्यादा खेती किया जाने वाला मशरूम है।
आइए जानें दुनिया में व्यापक रूप से उगाए जाने वाले 5 खाद्य मशरूम के बारे में:
बटन मशरुम

बटन मशरूम (अगारिकस बिस्पोरस) अपने हल्के स्वाद, मुलायम बनावट और पोषक गुणों के लिए लोकप्रिय हैं। वे प्रोटीन, विटामिन-बी, राइबोफ्लेविन, नियासिन और पैंटोथेनिक एसिड का अच्छा स्रोत हैं।
एक अनुमान के अनुसार दुनिया में खेती की जाने वाली लगभग 90% मशरूम एगारिकस बिस्पोरस और उनकी किस्में हैं। आप सर्दियों के दौरान उन क्षेत्रों में खेती कर सकते हैं जहां तापमान 20o सेल्सियस से नीचे रहता है।
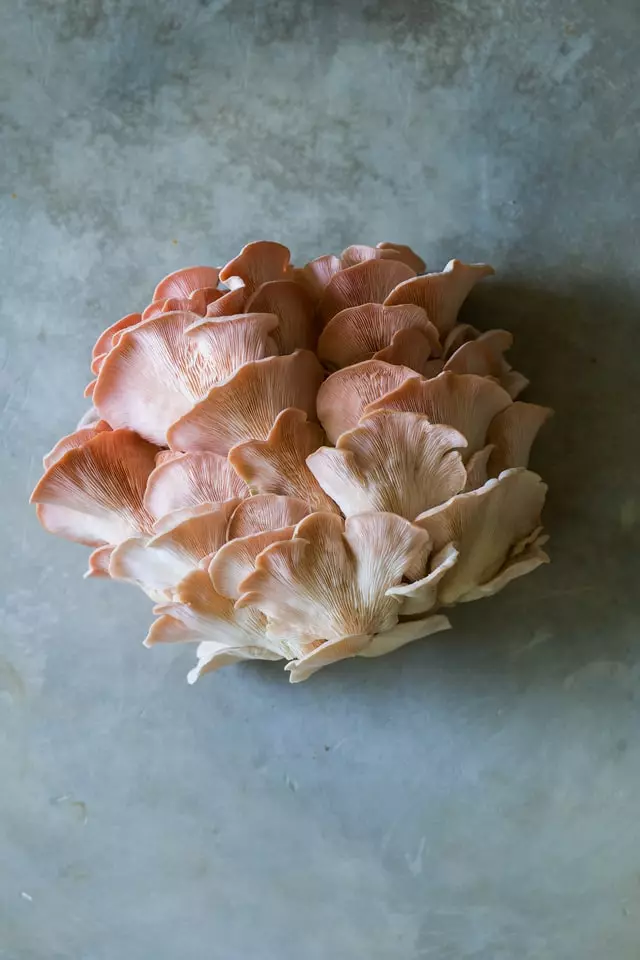
ऑइस्टर मशरूम
ऑयस्टर मशरूम (प्लुरोटस ओस्ट्रेथस) भी एक आम लोकप्रिय खाद्य मशरूम है। इसके अलावा किसान mycoremediation उद्देश्यों के लिए उद्योगों को बेचने के लिए सीप मशरूम की खेती भी कर सकते हैं।
इनकी खेती करना काफी आसान है और अगर आप मशरूम फार्म शुरू करने के बारे में सोच रहे हैं तो आप आसानी से ऑइस्टर मशरूम की खेती शुरू कर सकते हैं।
शियाटेक मशरूम
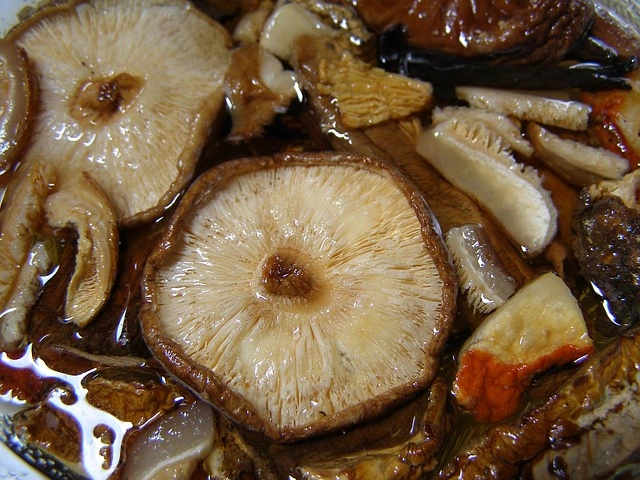
शियाटेक मशरूम (लेंटिनुआ एडोड्स) कम पानी की मात्रा, उच्च पोषक मूल्य और स्वाद के लिए प्रसिद्ध है।
शियाटेक मशरूम की व्यापक रूप से पूर्वी एशियाई देशों में खेती की जाती है और इनका उपयोग यहां भी पारंपरिक चिकित्सा के कुछ रूप किया जाता है। आप शियाटेक मशरूम की खेती इष्टतम तापमान सीमा 22 से 26 सेल्सियस के तहत कर सकते हैं और फसल चक्र लगभग 110 से 120 दिनों में समाप्त हो जाएगा।
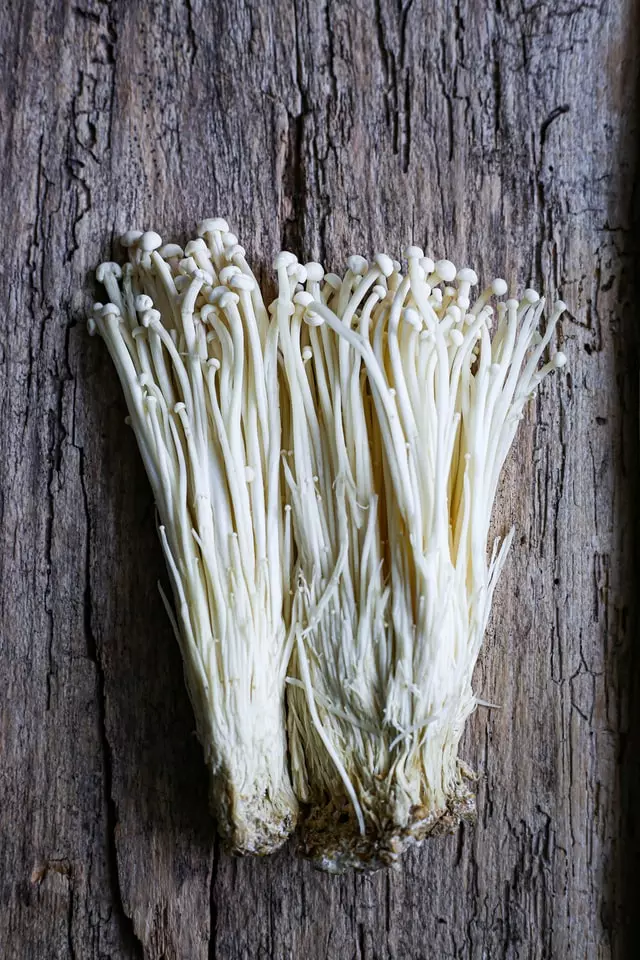
एनोकी मशरूम
एनोकी मशरूम (फ्लेमुलिना वेलुटिप्स) जो कि मखमली टांग के रूप में भी लोकप्रिय है, जापान की एक लोकप्रिय मशरूम प्रजाति है। वे अपने स्वाद के लिए लोकप्रिय हैं।
यह एक लंबा, पतला सफेद मशरूम है जिस पर छोटी-छोटी टोपियां होती हैं। एनोकी मशरूम का स्पॉन रनिंग 21 से 24o सेल्सियस के तापमान रेंज में हो सकता है और विकास 3 से 14o सेल्सियस के बीच हो सकता है। और फसल चक्र 4 से 6 सप्ताह में पूरा हो जाता है।
मोरेल मशरूम
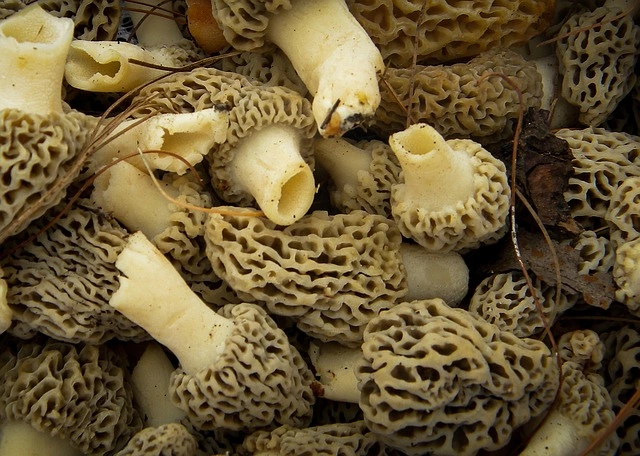
मोरेल मशरूम (मोर्चेला एस्कुलेंटा) जिसे गुची मशरूम के नाम से भी जाना जाता है, दुनिया के सबसे महत्वपूर्ण आर्थिक रूप से लाभकारी मशरूम में से एक है।
हालाँकि मोरेल मशरूम की खेती करना बहुत मुश्किल है, इसलिए बाजार में मोरेल मशरूम की कीमत अधिक है। एक किलोग्राम मशरूम की कीमत लगभग 10,000 से 30,000 भारतीय रुपये है।
अन्य लोकप्रिय खाद्य मशरूम जिनकी आप खेती कर सकते हैं वे हैं पोर्टोबेलो, स्ट्रॉ, मिल्की मशरूम आदि।
अब आप दुनिया में प्रसिद्ध खाद्य मशरूम के नाम जानते हैं। लेकिन आप सोच रहे होंगे कि आगे क्या है?
कीवी खेती , या अनाज या दलहन की फसल आदि की खेती के विपरीत, आप सीधे धूप में सीधे मिट्टी पर मशरूम की खेती नहीं कर सकते। मशरूम की खेती शुरू करने के लिए आपको एक बंद संरचना और सब्सट्रेट तैयार करने की जरूरत है।
इसमें थोड़ी मात्रा में निवेश की आवश्यकता होगी लेकिन कम समय में यह अच्छा रिटर्न दे सकता है। आप बांस आधारित या लकड़ी आधारित मशरूम हाउस का निर्माण कर सकते हैं।
सभी खाने योग्य मशरूमों में से ऑयस्टर मशरूम की खेती करना काफी आसान है। इसीलिए इस लेख में हम ऑयस्टर मशरूम की खेती के बारे में जानेंगे ताकि आप अपना खुद का ऑयस्टर मशरूम फार्म शुरू कर सकें।
मशरूम की खेती (ऑयस्टर मशरूम)
मौसम
ऑयस्टर मशरूम की खेती के लिए 18 से 25 सेल्सियस का तापमान आदर्श है। इसलिए उष्णकटिबंधीय क्षेत्रों में आप नवंबर से अप्रैल तक इसकी खेती शुरू कर सकते हैं। हालाँकि यदि आपने मशरूम हाउस में AKS कंट्रोलर लगाया है तो आप वर्ष के दौरान कभी भी आसानी से इनकी खेती कर सकते हैं।
लेकिन गर्मी के मौसम में रोग और कीटों के प्रकोप के कारण उपज कम हो सकती है। गर्मियों के दौरान आप सीप की प्लुरोटस सजोर-काजू या प्लुरोटस सैपिडस प्रजाति की खेती कर सकते हैं मशरूम क्योंकि वे इस मौसम में अच्छी तरह से विकसित हो सकते हैं।
विभिन्न ऑयस्टर मशरूम प्रजातियों के लिए इष्टतम तापमान की आवश्यकताएं हैं:
| साधारण नाम | वैज्ञानिक नाम | इष्टतम तापमान |
|---|---|---|
| सफ़ेद ऑयस्टर | प्लुरोटस फ़्लोरिडा | 20 to 28o सेल्सीयस |
| गुलाबी ऑयस्टर | प्लुरोटस डजमोर | 20 to 26o सेल्सीयस |
| ग्रे ऑयस्टर | प्लुरोटस सजोर-काजू | 20 to 28o सेल्सीयस |
| काली ऑयस्टर | प्लुरोटस ऑस्ट्रेटस | 18 to 22o सेल्सीयस |
सब्सट्रेट चयन
मशरूम सब्सट्रेट पर उगते हैं इसलिए अच्छी गुणवत्ता वाले सब्सट्रेट का चयन करना आवश्यक है। आप सब्सट्रेट के रूप में चावल, मक्का, केला, सरसों, चूरा आदि के सेल्यूलोसिक कृषि उत्पादों का उपयोग कर सकते हैं। हालाँकि धान का पुआल या चावल का पुआल ऑयस्टर मशरूम की खेती के लिए सबसे अच्छे सब्सट्रेट में से एक है।
लेकिन सुनिश्चित करें कि धान का भूसा अच्छी गुणवत्ता का हो और गीला न हो।
खेती के तरीके
आप इन दोनों तरीकों में से किसी एक का अभ्यास करके ऑयस्टर मशरूम की खेती कर सकते हैं:
- पॉलीबैग कल्चर/पॉलिथीन बैग विधि
- घन कल्चर विधि
इन दो तरीकों में से, पॉलिथीन बैग विधि का अभ्यास करना आसान है और मशरूम किसानों के बीच इसका व्यापक रूप से उपयोग किया जाता है। पॉलीबैग कल्चर विधि के माध्यम से ऑयस्टर मशरूम की खेती के लिए आपको आवश्यकता होगी:
- धान का भूसा
- ट्रे
- स्पॉन (मशरूम का बीज)
- पानी उबलने वाला ड्रम
- चारा कटर
- पारदर्शी पॉलिथीन बैग (45×20 सेंटीमीटर)
- सिंगल होल पंच मशीन
- स्प्रेयर
- जूट का धागा
- लहसुन का अर्क
इन सामग्रियों की मात्रा उस क्षेत्र पर निर्भर करेगी जिसमें आप मशरूम की खेती करने जा रहे हैं। एक बार जब आप इन महत्वपूर्ण सामग्रियों की व्यवस्था कर लेते हैं तो आपको इन चरणों का पालन करना होगा।
सब्सट्रेट की तैयारी
एक पॉलिथीन बैग के लिए अच्छी गुणवत्ता2 किलोग्राम धान का भूसासुनहरे पीले रंग का खरीदें। इस धान के भूसे को हैण्ड चॉपर या भूसा कटर से लगभग 5 सेंटीमीटर लंबा काट लें। फिर आपको इस कटे हुए भूसे को 6 से 8 घंटे (रात भर) के लिए ठंडे पानी में भिगोकर रखना है।
सर्दियों के दौरान आप भिगोने के लिए चूने के पानी का घोल तैयार कर सकते हैं। इसके लिए आप प्रत्येक लीटर पानी में 20 ग्राम CaCO3 मिला सकते हैं जिसका उपयोग आप कटे हुए भूसे को भिगोने के लिए कर रहे हैं।
भीगे हुए भूसे को ठंडे पानी से बाहर निकालें और 30 मिनट तक गर्म पानी से उपचार करें। गर्म पानी का तापमान लगभग 70 से 80o सेल्सियस होना चाहिए। पानी में भूसे को उबालने की यह प्रक्रिया रोगजनकों को नष्ट करने में मदद करेगी।
भूसे के उबलने के बाद उन्हें उबलते पानी से निकालकर साफ फर्श पर फैला दें. जब वे ठंडे हो जाएं तो कटे हुए भूसे को निचोड़कर अतिरिक्त पानी निकाल दें।
स्टॉक समाधान की तैयारी
50 ग्राम लहसुन की कलियों को 50 मिलीलीटर पानी में मिलाकर पेस्ट बनाकर स्टॉक घोल तैयार करें। इस तैयार पेस्ट को मलमल के कपड़े में निचोड़ लें और आपका स्टॉक घोल तैयार है.
3 से 5 मिलीलीटर लहसुन का अर्क या स्टॉक घोल को 1 लीटर पानी में मिलाकर 5 किलोग्राम कटे हुए उबले हुए भूसे के ऊपर छिड़कें। इससे मशरूम बेड के प्रदूषण को रोकने में मदद मिलेगी।
पॉलीबैग की तैयारी
मशरूम के आदर्श विकास को समर्थन देने के लिए उचित वेंटिलेशन तैयार करने के लिए यह कदम आवश्यक है। प्रत्येक पॉलीबैग को दो बार मोड़ें और पंच मशीन की सहायता से 10 सेंटीमीटर की दूरी पर छेद करें।
5 मिमी व्यास वाले छेद आदर्श होते हैं और प्रत्येक पॉलिथीन बैग में 15 से 20 छेद होने चाहिए। इससे ऑयस्टर मशरूम की वृद्धि के लिए उचित वेंटिलेशन मिल सकेगा। फिर पॉलीथिन बैग के बंद सिरे को बांध दें। ऐसा आप जूट की रस्सियों की मदद से कर सकते हैं. यह कदम बैग को एक गोल सपाट तल देगा।
आप वेंटिलेशन पाइप का भी उपयोग कर सकते हैं लेकिन यह एक वैकल्पिक तरीका है।
स्पॉनिंग
आप 2% की दर से स्पॉन का उपयोग कर सकते हैं, यानी 1 किलोग्राम भूसे के लिए आपको 20 ग्राम स्पॉन की आवश्यकता होगी। स्पॉनिंग के लिए सबसे पहले पॉलीबैग में कटे हुए उबले सूखे भूसे की 10 सेमी परत भरें और फिर इस परत को लगभग 5 सेमी की ऊंचाई तक हाथ से दबाएं।
इस परत पर 50 ग्राम स्पॉन फैलाएं। किनारों पर अधिक और बीच में कम फैलाएं। इस प्रक्रिया को जारी रखते हुए 5 परतें भूसे की तथा 4 परतें स्पॉन की तैयार करें।
एक बार जब पॉलीबैग भर जाए तो खुले सिरे को जूट की रस्सी से कसकर बांध दें। यदि संभव हो तो तैयार बैगों में प्रजातियों और अंडे देने की तारीख का उल्लेख करते हुए टैग जोड़ें। इससे मशरूम की खेती के बाद के चरणों में मदद मिलेगी।
स्पॉन रनिंग
स्पॉनिंग की प्रक्रिया पूरी करने के बाद भरे हुए और बंद पॉलीबैग को स्पॉन रन के लिए किसी अंधेरे और बंद कमरे में रखें। स्पॉन रनिंग की प्रक्रिया लगभग15 से 18 दिनोंमें पूरी हो जाएगी और इसके लिएलगभग 25 सेल्सियस तापमान की आवश्यकता होती है।
जब आप देखते हैं कि सफेद से क्रीम रंग का मायसेलियम मैट पूरे भूसे को ढक चुका है तो यह संकेत है कि स्पॉन रनिंग अब पूरी हो गई है।
मशरूम बेड को खोलना
एक बार जब स्पॉन रन की प्रक्रिया पूरी हो जाए तो आपको मशरूम बेड को सावधानीपूर्वक खोलने का अभ्यास करना होगा। हालाँकि गर्मियों के दौरान आप वैकल्पिक तरीका आज़मा सकते हैं जिसमें आपको ब्लेड की मदद से गाद तैयार करनी होगी।
उन स्थानों पर गाद जमा करें जहां गांठ और पिनहेड की शुरुआत होती है। इससे उस समय से मशरूम की अच्छी वृद्धि होगी। हालाँकि अन्य बढ़ते मौसमों में मशरूम बेड खोलना एक आदर्श अभ्यास है।
इसके लिए मशरूम बैग को ऊपरी सिरे से खोलें, उगाने वाली सामग्री को पकड़ने के लिए अपना हाथ रखें और इसे उल्टा कर दें। अब सावधानी से दूसरे हाथ की मदद से पॉलीबैग को पूरी तरह हटा दें। बढ़ते मायसेलियम को होने वाले नुकसान से बचाना सुनिश्चित करें।
अब कीटों और बीमारियों के संक्रमण से बचने के लिए इन खुले हुए मशरूम बेडों को अच्छी तरह से बंद और अंधेरे फसल कक्ष में रैक पर रखें। इससे माइसीलियम का हर तरफ से विकास होगा और आपको अधिक उपज मिल सकती है।
फसल अवधि एवं देखभाल
एक बार जब आप मशरूम बेड को फसल कक्ष में स्थानांतरित कर देते हैं तो आप 5 से 7 दिनों के भीतर गुच्छों में मशरूम फल निकायों की वृद्धि देखेंगे। इन्हें पिनहेड्स कहा जाता है. इस समयावधि के दौरान पानी का छिड़काव करके बिस्तर को नम रखें।
ये पिनहेड्स अपनी उपस्थिति के बाद 3 से 5 दिनों के भीतर पूरी तरह से विकसित हो जाएंगे। इस स्तर पर आप व्यावसायिक उद्देश्यों के लिए अपने खुद के उगाए ऑयस्टर मशरूम की कटाई कर सकते हैं। आप कटाई से 8 से 10 घंटे पहले पानी का छिड़काव कर सकते हैं।
किनारों का ऊपर या नीचे की ओर मुड़ना मशरूम के अधिक परिपक्व होने का संकेत है। इसलिए इस अवस्था से पहले कटाई करें। कटाई के बाद आप नई फसल उगाने के लिए फिर से पानी का छिड़काव शुरू कर सकते हैं।
कटाई प्रक्रिया
ऑयस्टर मशरूम की कटाई के लिए, फलने वाले शरीर के डंठल को अंगूठे और तर्जनी के बीच पकड़ें और इसे दक्षिणावर्त घुमाएँ। अन्य बैक्टीरिया या कवक के सैप्रोफाइटिक विकास से बचने के लिए बिस्तर से स्टाइप के सभी हिस्से को हटाने का ध्यान रखें।
पहली कटाई के बाद मशरूम का अगला फूल15 से 20 दिनों के भीतर दिखाई देगा। पहली तीन फसलें आर्थिक फसल मानी जाती हैं। आप इन कटे हुए मशरूमों को व्यावसायिक बाज़ार में बेच सकते हैं।
लेखक का नोट
मुझे लगता है कि अब आप ऑयस्टर मशरूम की खेती के बारे में स्पष्ट हो गए हैं। यदि आपके पास कोई विचार, प्रश्न या सुझाव है तो नीचे टिप्पणी करें। आप फेसबुक, इंस्टाग्राम और कू पर भी एग्रीकल्चर रिव्यू से जुड़ सकते हैं।
