Do you want to learn How to grow capsicum, if yes, then you are on the right page. In this article Agriculture Review will guide you on growing capsicum in your home garden.
Table of Contents
Introduction
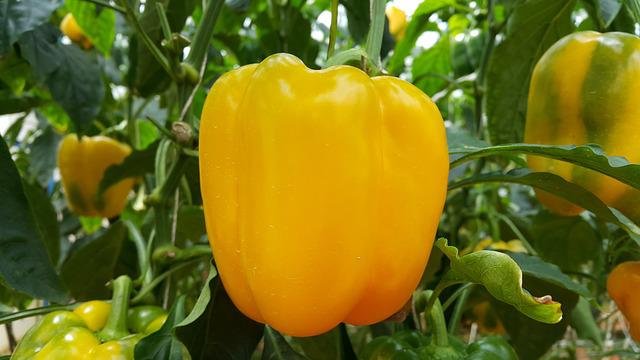
Bell pepper (Capsicum annum) also called sweet pepper or capsicum pepper is a genus of flowering plants in the nightshade family Solanaceae. It is native to America where they have been cultivated for thousands of years. Now peppers are cultivated worldwide and use in many cooked dishes and in salads. The large furrowed fruits are technically berries and maybe green, red, yellow, or orange. Fruits are high in vitamin-A and Vitamin-c.
Bell pepper plants are grown as annuals and the green fruits are harvested before the appearance of red or yellow pigment.
Growing bell peppers in garden containers is a great idea if you are short of space. Mr. Sital Sarkar has shared his tips with Agriculture Review.
How To Grow Capsicum?
Capsicum can be propagated from nursery plants or from seeds. The best season to grow capsicum in the container is February to May. But you can also grow capsicum in July to October in tropical regions.
Potting Mix
Prepare Seedling potting mix by 50% loamy soil + 40% coco peat + 5% composes + 5% sand. If these materials are not available then use any seedling potting mix. To plant new seedling use potting mix 60% loamy soil+30% coco peat + 5% compose + 5% sand.
Add 5 gm Neem Cake per pot to protect plants from soil born diseases and pests.
Selection of Pot
Use the containers made of ceramic, clay, plastic or terra cotta. You can select Containers of 12-16 inch diameter with a depth of 6-10 inches. Take care of having a good drainage system with at least 3 to 4 holes per container.
Propagation
If you want to propagate it from seed than buy good quality seeds from seed sellers. It is locked down now so you can use capsicum in your kitchen for obtaining seeds. When you cut the capsicum fruit into two halves you will see lots of seeds, you can use it for propagation.
To germinate seeds use a germination tray and fill it with seedling potting mix.
Now plant seeds 2-3 cm deep and cover it with soil lightly. Now wet the soil but do not apply an overdose of water.
Keep the tray in warm, and humid conditions for fast germination. Soil and air temperature should be 20 to 27degree centigrade for the best result.
Germination Tray does not need direct sunlight for 1-2 weeks. Wrap the tray with plastic foil to keep the soil moist. Germination period depends upon the climatic conditions. It will take 10 to 25 days.
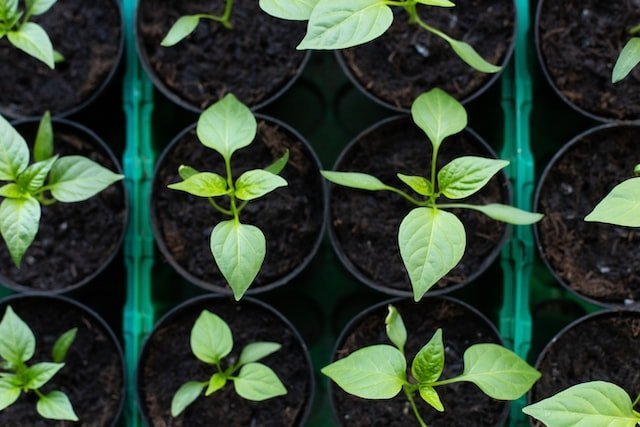
Once the germination starts remove plastic foil and move your tray to a bright sunny place. During germinating, you should keep the soil moist all time. The dryness of the soil can reduce the chances of seed germination. After germination thin out the weak plants and keep healthy plants.
When seedlings are developing true leaves, they are now ready to transplant in large containers.
Transplantation
Now fill the containers with potting soil leaving a two-inch distance between the soil surface and rim of the containers. Remove seedling or nursery plants without damaging the roots from their old container. Dig 2-3 inch holes in the middle of the new container and plant the young plants. Now cover the roots with potting mix loosely.
Cover the base of the plant with an inch layer mulch (chopped straw). Mulching is compulsory in the dry season. Now place the containers where it can receive at least 6 to 7 hours of sunlight.
Watering
Do not overwater and underwater the plant. A strict water schedule should be provided for young plants until the roots get well established in the soil. In summer or dry weather water the plants once in a day as per requirement. Apply water only to the soil around the base of the plant.
Fertilizers
Feeding the plant with ½ teaspoon bone meal is necessary for every 2 weeks. Avoid nitrogen-rich fertilizer, too much nitrogen increases foliage and decrease the fruit production. Feed the plant with seaweed mix, weekly ¼ teaspoon of seaweed will increase blooming and fruit production.
Using Epsom salt also improves the yield of plants. Half tablespoon Epsom salts dilute in 1-liter freshwater and spray it during the blooming period.
Pruning is not compulsory but the plant can be pruned if required. Pollination increases the production of fruit in the plant. To pollinates just shake the flowers or plant at the time of blooming.
Green fruits are harvested before the appearance of red or yellow pigment. Generally 60-80 days after transplanting.
READ MORE: WHAT IS WASTE DECOMPOSER?
Pest and Disease
Though bell peppers are relatively hardy, various diseases and viruses can attack the plant and require immediate treatment to prevent fruit loss and death plant.
a) For root infection use any broad-spectrum fungicide.
b) Use insecticidal soap for viral infection in leaves and fruits.
c) Use any standard vegetable fungicide to control leaf spots.
d) Use Streptomycin sulfates as a spray to kill a bacterial infection.
e) You will also need to keep an eye on spiders and mites.
f) You can also use Neem Oil Spray. To Know “How To Make Neem Oil Spray For Plants”, click on the text.
READ MORE: DISEASE MANAGEMENT OF BELL PEPPER
Benefits of Bell Pepper
- Its fruit has Vitamin A, Vitamin C, and Potassium, Iron. Fibers etc.
- It gives satisfying taste to the food.
We hope you enjoyed reading and understanding our article on “How to Grow Capsicum”. It is the month of May so take out capsicum in your Kitchen and start growing. Tell us your experiences and problems in growing Capsicum.
